domingo, 25 de mayo de 2014

CHOCOLATE BRAIDS / TRENZAS DE CHOCOLATE.


Por aquí estoy otra vez, sí, ya sé que de pronto desaparecí pero fué por una buena razón y es que al final encontré trabajo de lo mío así que estaba en otra cosa pero he vuelto, así que no me enrollo más y voy al grano, hoy receta fácil, fácil y resultona y bueno,buena no, buenísima, de hecho, voy a dejar de hacerlas porque luego me las como todas y no puede ser,pues bueno,vamos allá!!!!


Here I'm again, I know it, suddenly I dissapeared but it was for a good reason,I finally found a job on my field so I was focused on other thing but I have come back, so I'm not going to talk more and I will come to the point, today, I have an easy and great recipe and, well, it doesn`t taste good, it tastes pretty good, in fact, I'm going to stop making them because then, I eat all of them and it can´t be, so here we go!!

1. WHAT DO I NEED? / QUÉ NECESITO?


- Azúcar.
- 1 lámina de hojaldre.
- Crema de chocolate.


- Sugar.
- 1 sheet of puff pastry.
- Chocolate cream.


2. WE ROLL THE PUFF PASTRY WITH A ROLLER / EXTENDEMOS EL HOJALDRE CON AYUDA DE UN RODILLO.


3. WE CUT THE PUFF PASTRY AS THE FOLLOWING PICS / CORTAMOS EL HOJALDRE COMO EN LAS SIGUIENTES FOTOS.


- Primero, cortamos el hojaldre en 6 trozos (depende como uno quiera, se puede hacer sólo una más grande,medianas como yo las he hecho,o más pequeñas,todas se hacen igual, ya es como uno quiera).


- First, we cut the puff pastry in 6 pieces (it depends on you want, it can be just one more bigger, medium size as I did them or small size, all of them made with the same process, it is how you want).


- Después, hacemos estos cortes en cada trozo.


- Then, we make these cuts in each piece.


4. WE FILL EACH PIECE WITH CHOCOLATE CREAM / RELLENAMOS CADA TROZO CON EL CHOCOLATE.


- La cantidad es según el gusto de cada uno.


- The amount of chocolate cream is how you want.


5. WE WRAP THE PUFF PASTRY  THAT WAY / ENRROLLAMOS LA MASA DEL SIGUIENTE MODO.


6. FINALLY,WE SPRINKLE SOME SUGAR AT TOP AND WE PUT IN THE OVEN PREHEAT AT 180ºC FOR 20 MINUTES / POR ÚLTIMO, ESPOLVOREAMOS UN POCO DE AZÚCAR POR ENCIMA Y METEMOS EN EL HORNO A 180ºC DURANTE 20 MIN.


Y finalmente tenemos nuestra trenza de chocolate derretido por dentro que, si tarda poco en hacerse menos tarda en desaparecer!! ;) Besitos!!!


And finally, we have our melted chocolate braid which takes very little to make them, it´s much quicker to dissapear!!! ;) Kisses!!


jueves, 13 de marzo de 2014

HOMEMADE EDIBLE PLASTICINE./ PLASTILINA CASERA COMESTIBLE.

Buenos días!!Este post está dedicado a los más pequeños de la casa, desde que estoy viviendo en Inglaterra he conocido a varias personas que trabajan de niñeros/as y, claro, estar tantas horas pendientes de los niños y entreteniéndolos, pues se te acaban las ideas, así que investigando por internet, encontré un blog muy interesante, "bekiapadres" y me entró el gusanillo así que no me quedó otra que intentarlo, se trata de hacer plastilina casera comestible, lo bueno de ésto es que para los niños es un doble juego, primero hacerla y después jugar con ella, y estoy segura, que les encantará poder jugar con algo que han hecho ellos mismos, por otro lado creo que aunque es uno de los juegos más antiguos, es de los más divertidos y desarrollan su creatividad, a mí me encantaba!!!! De hecho, creo que me encanta la repostería creativa precisamente por eso, viene a ser igual que la plastilina y siempre puedes inventar cosas distintas, lo mejor de todo es q al ser comestible, es seguro 100% para los más pequeños, pues bueno,vamos allá!!


Good morning!!!this post is dedicated to the youngest children of the house, I've met a lot of people since I am living in England who work as au-pairs and, obviously, are a lot of time looking after the kids and entertain them, finally, you don't have ideas for playing with them, so I was searching on internet and I found an interesting website "bekiapadres" and I had to try it, it's a homemade edible plasticine, the best is that is a double game for the kids, on one hand, they make it and on the other hand, they can play with it, and I´m sure that they will enjoy a lot with something made by themselves, however, I think is one of the oldest games but is one of the funniest and they can grow up their creativity, I loved it when I was a child!!!!!! Indeed, I think I love the sugarcraft because is very similar and you always can create different things, the best of all is that it's edible so is 100% safe for the youngest kids, so here we go!!!!!!


1.WHAT DO I NEED? / QUÉ NECESITO?


- 2 Tazas de agua.
- 2 Tazas de harina.
- 1 Taza de sal.
- 2 cucharadas de aceite vegetal.
- Colorantes comestibles.


- 2 Cups of water.
- 2 Cups of flour.
- 1 Cup of salt.
- 2 spoons of vegetable oil.
- Food colorings.


2.WE HEAT THE WATER (DON'T LEAVE IT BOIL) / CALENTAMOS EL AGUA (SIN LLEGAR A HERVIR).


- Retiramos del fuego.

- Remove from heat.


3. WE ADD ALL INGREDIENTS (EXCEPT FOOD COLORINGS) AND STIR UNTIL GET IT SMOOTH./ AÑADIMOS TODOS LOS INGREDIENTES (EXCEPTO LOS COLORANTES) Y REMOVEMOS HASTA QUE QUEDE SIN GRUMOS.


4.WE PUT ON A SLOW HEAT AGAIN AND STIR UNTIL GET A DOUGH./ PONEMOS A FUEGO LENTO Y REMOVEMOS HASTA CONSEGUIR UNA MASA.


- Debe tener este aspecto.


-It should look like this.


5.WE ALLOW TO COOL INSIDE THE SAUCEPAN./ DEJAMOS ENFRIAR DENTRO DEL CAZO.


6.KNEAD THE DOUGH GENTLY FOR 2 MINUTES./ AMASAMOS DESPACIO DURANTE 2 MINUTOS.


- En este paso añadí estracto de naranja comestible, para que tuviera un olor agradable pero es opcional.

-In this step I added orange flavoring food to give it good smell but it's optional.


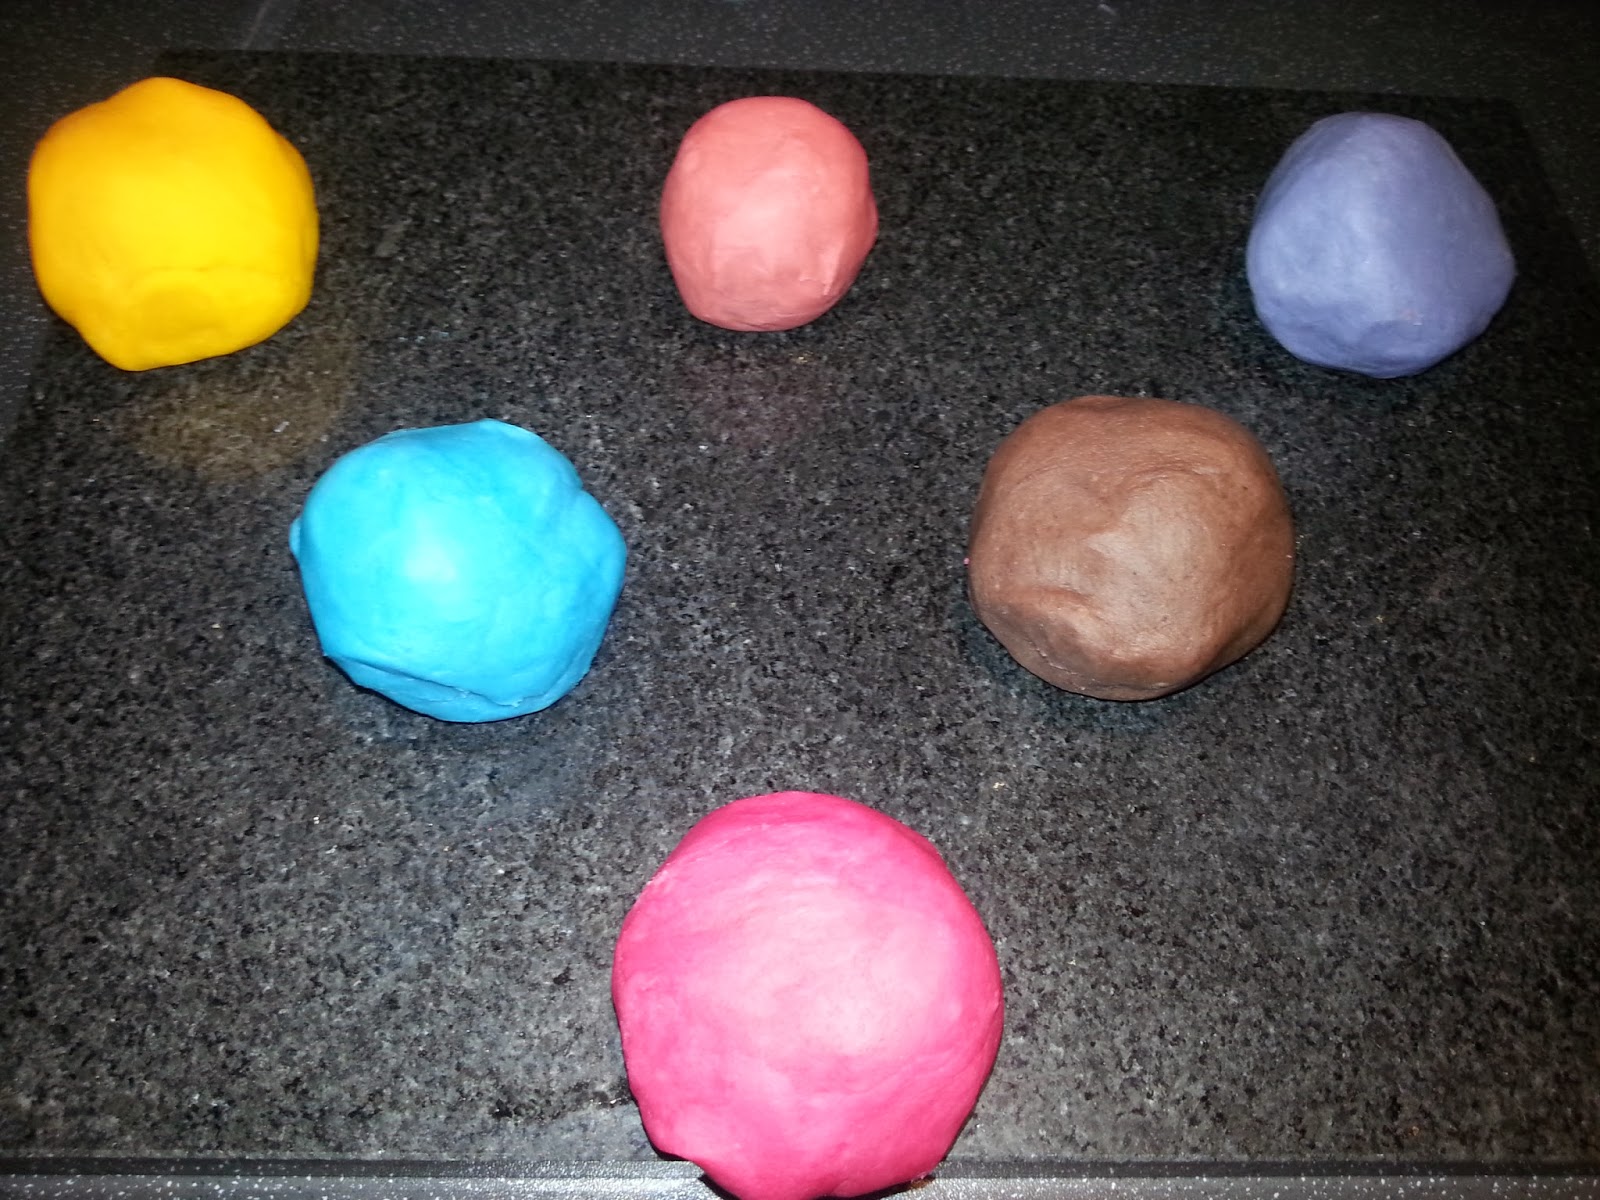
7.WE DIVIDE IN SOME PARTS AND ADD THE FOOD COLORINGS./ DIVIDIMOS LA MASA EN VARIAS PARTES Y LAS TINTAMOS.


8.WE KNEAD THE DOUGH TO GET AN UNIFORM COLOUR. / AMASAMOS PARA CONSEGUIR UN COLOR UNIFORME.


Y éste es el resultado, para conservarlo en perfecto estado lo ideal es guardarlo en bolsas para congelar o tuppers y al frigo, si se pone un poco dura añadimos agua y listo!!!! Espero que las/los que tengáis niños o cuidéis de ellos lo intentéis, es muy divertido!!!!un besito y hasta la próxima!!!!!


And this is the result, to keep in a good conditions to keep it in a freezer bags o tupperwares and put it inside the fridge, if it gets tough you just add some water drops!!! I hope who have kids or look after them try it, is pretty  funny!!!!kisses and see you soon!!!!!


lunes, 10 de marzo de 2014

EASY HOMEMADE JAM IN 10 MINUTES./ MERMELADA CASERA FACIL EN 10 MINUTOS.

Buenassss.....ya sé que he tardado un poquito en escribir pero esta semana pasada he estado bastante liada reformando nuevos muebles así que se me ha ido el santo al cielo, para compensar esta semana habrá más entradas, :)). Así que espero que os guste.
La entrada de hoy ha sido para aprovechar unas fresas que compré hacía días y, bueno, se pusieron un poquito blanditas, consecuencia? Pues que al final, no te las comes, y como siempre mi objetivo es aprovecharlo todo, y si es con comida más, porque con tanta gente pasando hambre en el mundo, eso de tirar comida como que no, se me corta el cuerpo, así que cuando compréis fresas y veáis que se han puesto un poco mustias, no las tiréis!! Aprovechadlas para hacer esta fácil receta que se hace en un segundo y está buenísima!!
En fin, no me enrollo más y vamos al grano!!!!


Good afternoon.......I know It´s been a long time I don´t write but last week I was really busy refurbishing new furnitures so I had to postpone the new post but this week you will have more posts to offset it, :)). I hope you like them.

I wrote this post because I bought some strawberries some days ago, I didn't eat them, and they ripened quickly,what's the consecuence? Finally, I don't eat them, and I always try to use everything, especially if it's food, because there are so many hungry people in the world, so I can´t  through food away, I get sick, so when you buy strawberries and they become ripe, don't through them out!!!!! You can use them to make this easy recipe which you can make it in a second and it´s very tasty!!!!
So, I am going to stop talking and let's go to the point!!!!!

1. WHAT DO I NEED? / QUÉ NECESITO?


Vinagre de Módena.
- 225 grs de puré de fresas (troceamos las fresas y las trituramos con la batidora).
- 175grs de azúcar (normalmente, se le echa la misma cantidad de azúcar que de fruta,en este caso serían 225 grs de azúcar, pero como no me gusta tan dulce le echo menos, pero es a gusto del consumidor).


- Balsamic vinegar of Modena.
- 225grs strawberry puree ( dice the strawberries and  we squeeze them with a blender).
- 175 grs white sugar (usually, we put the same amount of sugar and fruit but I don´t like very sweet so I put less, but it's up to you).


2. WE PUT THE SUGAR IN A FRYING PAN AND HEAT IT UNTIL TO MAKE A CARAMEL./ PONEMOS EL AZUCAR EN UNA SARTÉN HASTA QUE SE HAGA CARAMELO.


3. WE PUT THE PUREE IN THE FRYING PAN AND WE HEAT IT./ ECHAMOS EL PURE DE FRESAS Y CONTINUAMOS CALENTANDOLO.


Probablemente, cuando echemos las fresas aparecerán trozos de caramelo, esto es normal,seguimos calentando y moviéndo hasta que el caramelo se funda.

Probably, when we put the purée, the caramel chunck will appear, but it´s normal, it has to be heated and moved until it melts.


4. WE PUT SOME VINEGAR./ ECHAMOS UN POCO DE VINAGRE.


Este paso es para intensificar el sabor de las fresas, el vinagre de Módena hace que las fresas tengan más sabor.

With this step we intensify the strawberry taste, balsamic vinegar of Módena enhances the flavor of the strawberries.


5. WE CARRY ON HEATING FOR 1-2 MINUTES MORE./ SEGUIMOS CALENTANDO UNO O DOS MINUTOS MÁS.


Y ya está lista!!! Si queremos guardarla para usarla posteriormente tenemos dos opciones, una, hervimos los tarros durante 30min, o dos, rellenamos los botes con la mermelada y los ponemos boca abajo durante 12h (yo hice esto pero al final la usé al día siguiente ;P).


And that´s it!!!!! If you want to keep it to use after we have two options, one, we boil the jar for 30minutes, or two, we fill in the jar with the jam and we turn upside down for 12 hours ( I did that but finally, I used it the next day ;P )


Espero que os haya gustado, nos vemos muy pronto!!!!!Disfrutadla!!

I hope you like it, see you very soon!!!!!!!!!!!!!  Enjoy it!!!!!!!!!!!


martes, 4 de marzo de 2014

NEW BIRTHDAY CAKE / NUEVA TARTA DE CUMPLEAÑOS.

Otra vez ando por aquí, este fin de semana ha sido algo movidito, el sábado me enteré de una feria vintage muy cerquita de aquí, Milton Keynes se llama la ciudad, estuve leyendo por internet y es una de las ferias vintage más grandes de Inglaterra, al menos, eso decía la página, el caso es que sólo se celebra tres veces al año así que no podía perderme tal acontecimiento. La feria me encantó, era enorme y había toda clase de antiguedades, una fuente de inspiración para mí, así que después de 4h de feria, llegué a casa y me puse manos a la obra con una tarta porque al día siguiente era el cumpleaños de una amiga, en un principio pense en hacerle alguna con algún modelado en fondant pero al final decidí experimentar y el experimento acabó siendo un mix de dos de mis tartas preferidas, el resultado? Tarta de mousse de fresas con base de brownie, chocolate fundido por encima y frambuesas, el contraste del dulce con lo ácido de las frambuesas,espectacular!!!!La cumpleañera quedó encantada, felicidades otra vez Natalia!!!
También felicito desde aquí a mi tía Mati y a Anita piccola, que fueron sus cumples la semana pasada y aunque no podáis probarla por la distancia, también es para vosotras, felicidades!!!!
Os dejo unas fotitos para que la veáis y unas cuantas más de la feria de antiguedades, espero que os guste y lo disfrutéis!!Besitos a todos!!!


Here I´m again, it was a pretty busy weekend, on Saturday I discovered a vintage fair very close from here, Milton Keynes is called the city, I was reading some information on the internet, and it seems to be one of the biggest vintage fair of England, at least it was written on the website, the thing is that it comes just 3 times a year so, I couldn´t miss this remarkable event. I loved this fair, so huge and there were all kind of antiques, a source of inspiration for me so, after 4 hours at this fair, I arrived home and I started to plan a cake because the following day was a birthday party's friend, initially I thought to make a sugarcraft cake but finally, I decided to experiment which became a mix between two of my favorites cakes, what was the result? Strawberry mousse cake with brownie sponge, melted chocolate and raspberries, the contrast between sweet and tangy taste, is spectacular!!!!!!! The birthday girl fell in love, Happy Birthday again, Natalia!!!
I would like to wish my aunt and my friend, Anita piccola, a happy birthday from here because her birthdays were last week and although you were so far and you can´t try this cake, is for you too, Happy Birthday!!!!!
Now if you want to have a look, here you are the pictures from the vintage fair and the cake, I hope you like and enjoy it!!! Kisses to you all!!!!!


jueves, 27 de febrero de 2014

MAGNETIC BLACKBOARD / PIZARRA MAGNETICA.

Desde pequeña siempre me han encantado las manualidades, construir cosas etc... mi madre me recuerda en muchas ocasiones que cuando tenía 4 ó 5 años tuve una época en la que me dió por escribir poesías en la pared, eso sí, muy artística yo le ponía su orla y todo, quedaba monísima, así que cuando mi madre se despertaba de la siesta, tachán!!!! se encontraba con el sorpresón, para mí era una obra de arte, claro que para mis padres no tanto, no sé cuántas veces tuvieron que pintar el pasillo, pues en fin, me sigue encantando pintar, etc...pero claro,ya me he "reformado" un poco y, al menos, no sigo haciéndolo en la pared. Llevo ya tiempo buscando por internet una de esas pizarras de vinilo monísimas pero ninguna me acababa de convencer, por el dibujo, por el tamaño, por el precio (quería varias), etc...  así que como decidí tener una casa totalmente d.i.y y dar rienda suelta a mi imaginación, empecé a investigar a ver cómo podía hacerla.


Since i was a child, I have always loved crafts, building things, etc...my mum always remembers me many times when I was 4 or 5 years old I had a time when I always wrote poems onto the wall, constantly, I was very artistic so I put a lot of ornaments around the poems, It was really nice, and when my mum woke up after siesta time.....ta-rah!!!!! I surprised her with my creation, It was a work of art, but I think my parents didn´t think the same like me, I don´t know how many times they had to paint the corridor, but well, I still love painting,etc....although, obviously, I "changed" myself a little bit  and, at least, I don´t do it onto the wall. I have been searching on internet one of those vynil blackboards long time ago which are so cute but I wasn´t convinced about any of them, because I didn´t like the design, or size, or price ( I wanted some of them), etc...so, as I wanted a d.i.y home and to be creative and let my imagination run free, I investigated about how I could make it.


1. WHAT DO I NEED? / QUE NECESITO?


- Pinceles,brochas,rodillos.
- Papel para empapelar paredes apto para pintar.
- Pintura magnética.
- Pintura de pizarra ( hay muchos colores, no tiene que ser negra).
- Pintura de color (opcional).
- Cúter.

-Diferent sizes of brush and roller paint.
- Wallpaper suitable for painting.
- Magnetic premier.
-Blackboard paint (there are a lot of colours, It doesn´t have to be black if you don´t want).
 - Colour paint (optional).
 - Cutter.

2. WE CHOOSE THE DESIGN AND SIZE./ ELEGIMOS EL DISEÑO Y EL TAMAÑO.


Yo elegí un tamaño bastante grande y no quería complicarme con el dibujo, así que corte dos trozos de papel de empapelar y los uní con fixo de doble cara para que fuera más grande. El diseño lo podéis imprimir y calcar, pero como el mío era muy grande decidí pintar a ojo una especie de mariposa abstracta.

I chose a big size but I didn´t want to make a design very complicated, so I cut two pieces of wallpaper and taped both with both side tape because my design was huge. You can print and copy with tracing paper, but my shape was really big so I decided to create a freehand drawing like abstract butterfly.


3. WE PAINT FILLING THE SHAPE./ PINTAMOS RELLENANDO LA FORMA.


- Le damos 3 capas de pintura magnética y dos de pizarra (debemos esperar entre capa y capa a que se seque totalmente).

- We apply 3 coats of magnetic primer and 2 of blackboard paint (waiting until each coat is dry before applying the next coat).


4. WE PAINT A BORDER WITH OTHER COLOUR (OPTIONAL) / PINTAMOS UN BORDE DE OTRO COLOR (OPCIONAL).


- Recortamos el papel sobrante con un cúter.

-We cut out the excess of wallpaper with an utility knife.


5. WE CAN PUT BOTH SIDE TAPE TO PUT ONTO THE WALL OR APPLY WALL PAPER GLUE DIRECTLY ONTO THE WALL./ PONEMOS FIXO DE DOBLE PARA PEGARLO A LA PARED O LO PEGAMOS CON COLA PARA EMPAPELAR.


- Yo elegí la primera opción porque así puedo cambiarla de sitio y no ensucio la pared.

I chose the first option to move it when I want and don´t stain the wall.


Y ya sólo nos queda elegir imanes y un sitio dónde ponerla, yo elegí la cocina, para apuntar las cosas que se me olvidan por comprar, poner mensajitos, etc...así que si tenéis niños, necesitáis dónde apuntar cosas o simplemente os gusta, os aconsejo una, es muy práctica, original y decorativa. Espero que os haya gustado mi nueva entrada. Besitos!!


Now all you have to do is choose magnets and decide where you want put it on, I chose the kitchen to write all things which I forget to buy, writing messages, etc.... so if you have kids, you need where you write things or simply you like it, I advice you to make one of them, is pretty practical, original and decorative. I hope you like my new post. Kisses!!!!!!


        - Detalle de los imanes.              - Magnets detail.