Good morning!!!this post is dedicated to the youngest children of the house, I've met a lot of people since I am living in England who work as au-pairs and, obviously, are a lot of time looking after the kids and entertain them, finally, you don't have ideas for playing with them, so I was searching on internet and I found an interesting website "bekiapadres" and I had to try it, it's a homemade edible plasticine, the best is that is a double game for the kids, on one hand, they make it and on the other hand, they can play with it, and I´m sure that they will enjoy a lot with something made by themselves, however, I think is one of the oldest games but is one of the funniest and they can grow up their creativity, I loved it when I was a child!!!!!! Indeed, I think I love the sugarcraft because is very similar and you always can create different things, the best of all is that it's edible so is 100% safe for the youngest kids, so here we go!!!!!!
1.WHAT DO I NEED? / QUÉ NECESITO?

- 2 Tazas de agua.
- 2 Tazas de harina.
- 1 Taza de sal.
- 2 cucharadas de aceite vegetal.
- Colorantes comestibles.
- 2 Cups of water.
- 2 Cups of flour.
- 1 Cup of salt.
- 2 spoons of vegetable oil.
- Food colorings.
2.WE HEAT THE WATER (DON'T LEAVE IT BOIL) / CALENTAMOS EL AGUA (SIN LLEGAR A HERVIR).

- Retiramos del fuego.
- Remove from heat.
3. WE ADD ALL INGREDIENTS (EXCEPT FOOD COLORINGS) AND STIR UNTIL GET IT SMOOTH./ AÑADIMOS TODOS LOS INGREDIENTES (EXCEPTO LOS COLORANTES) Y REMOVEMOS HASTA QUE QUEDE SIN GRUMOS.
4.WE PUT ON A SLOW HEAT AGAIN AND STIR UNTIL GET A DOUGH./ PONEMOS A FUEGO LENTO Y REMOVEMOS HASTA CONSEGUIR UNA MASA.

- Debe tener este aspecto.
-It should look like this.
5.WE ALLOW TO COOL INSIDE THE SAUCEPAN./ DEJAMOS ENFRIAR DENTRO DEL CAZO.
6.KNEAD THE DOUGH GENTLY FOR 2 MINUTES./ AMASAMOS DESPACIO DURANTE 2 MINUTOS.

- En este paso añadí estracto de naranja comestible, para que tuviera un olor agradable pero es opcional.
-In this step I added orange flavoring food to give it good smell but it's optional.

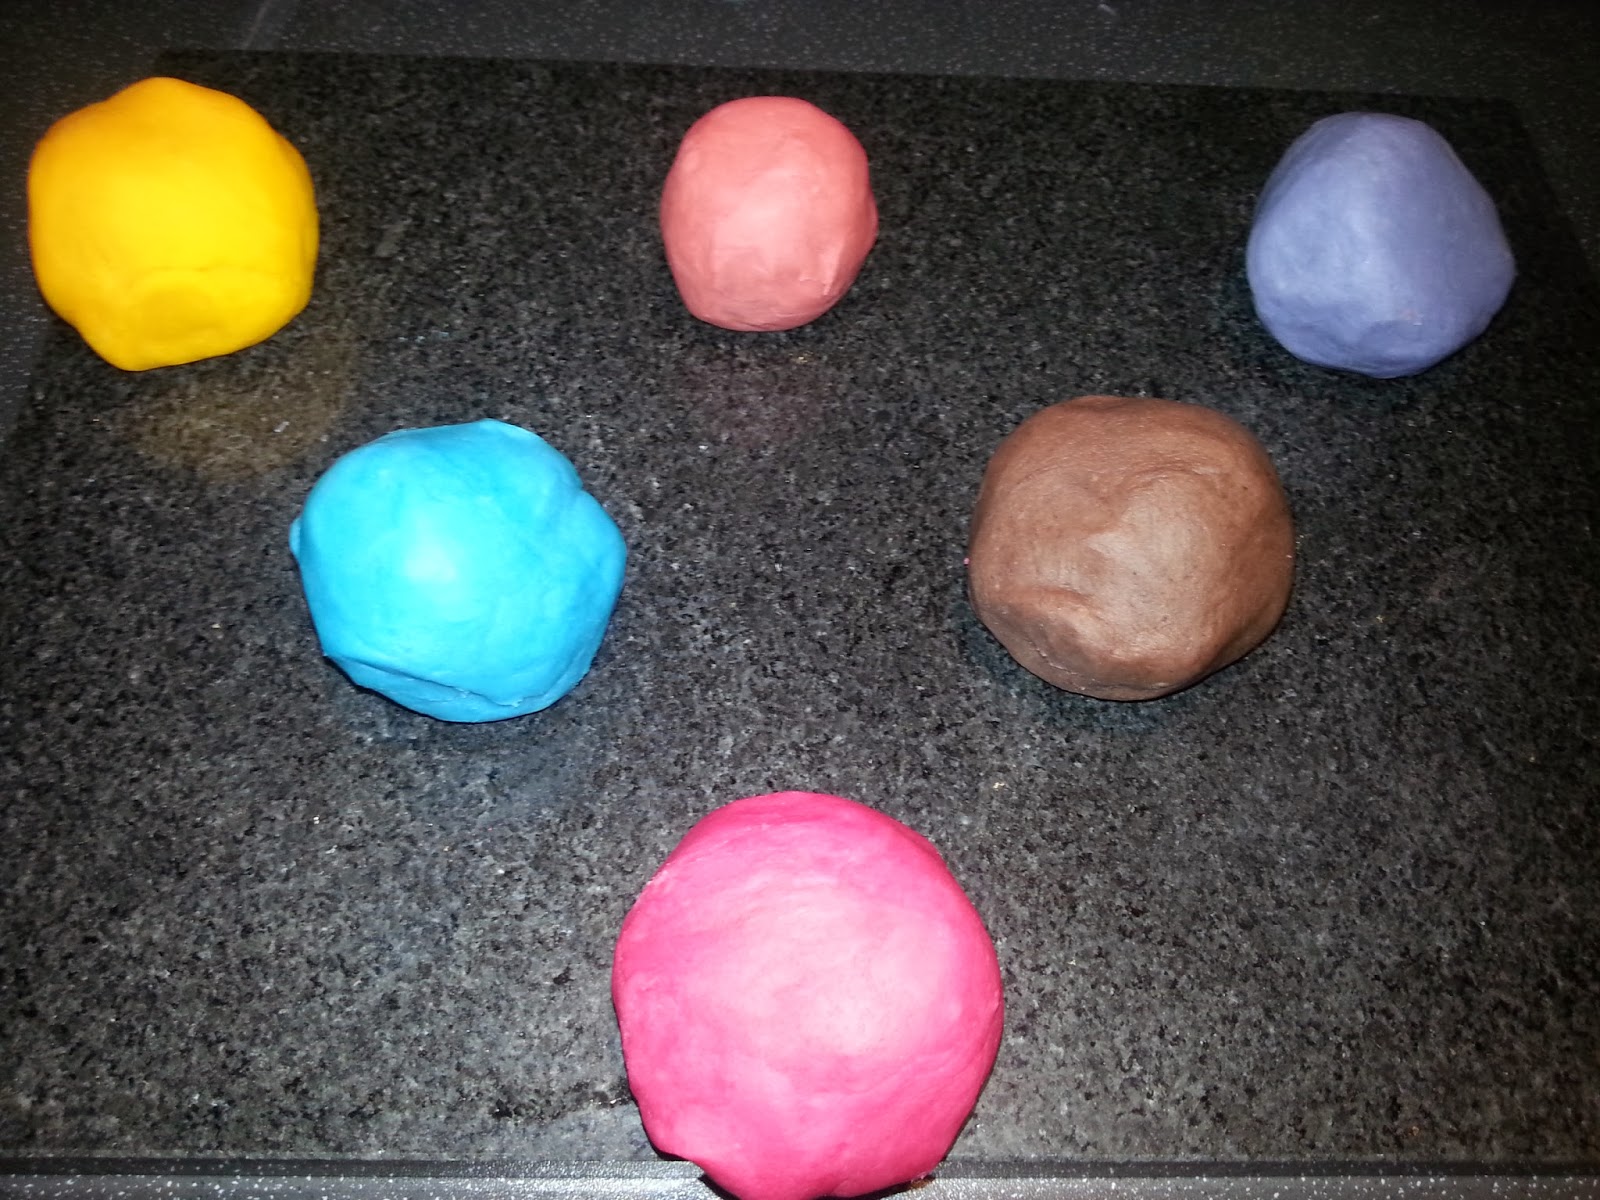
8.WE KNEAD THE DOUGH TO GET AN UNIFORM COLOUR. / AMASAMOS PARA CONSEGUIR UN COLOR UNIFORME.
Y éste es el resultado, para conservarlo en perfecto estado lo ideal es guardarlo en bolsas para congelar o tuppers y al frigo, si se pone un poco dura añadimos agua y listo!!!! Espero que las/los que tengáis niños o cuidéis de ellos lo intentéis, es muy divertido!!!!un besito y hasta la próxima!!!!!
And this is the result, to keep in a good conditions to keep it in a freezer bags o tupperwares and put it inside the fridge, if it gets tough you just add some water drops!!! I hope who have kids or look after them try it, is pretty funny!!!!kisses and see you soon!!!!!


No hay comentarios:
Publicar un comentario